
Auto Body Diamond Bar: The Complete Guide to Collision Repair Done Right
Last updated: 2025-07-14 | 15-minute read | Serving Diamond Bar, CA and surrounding communities

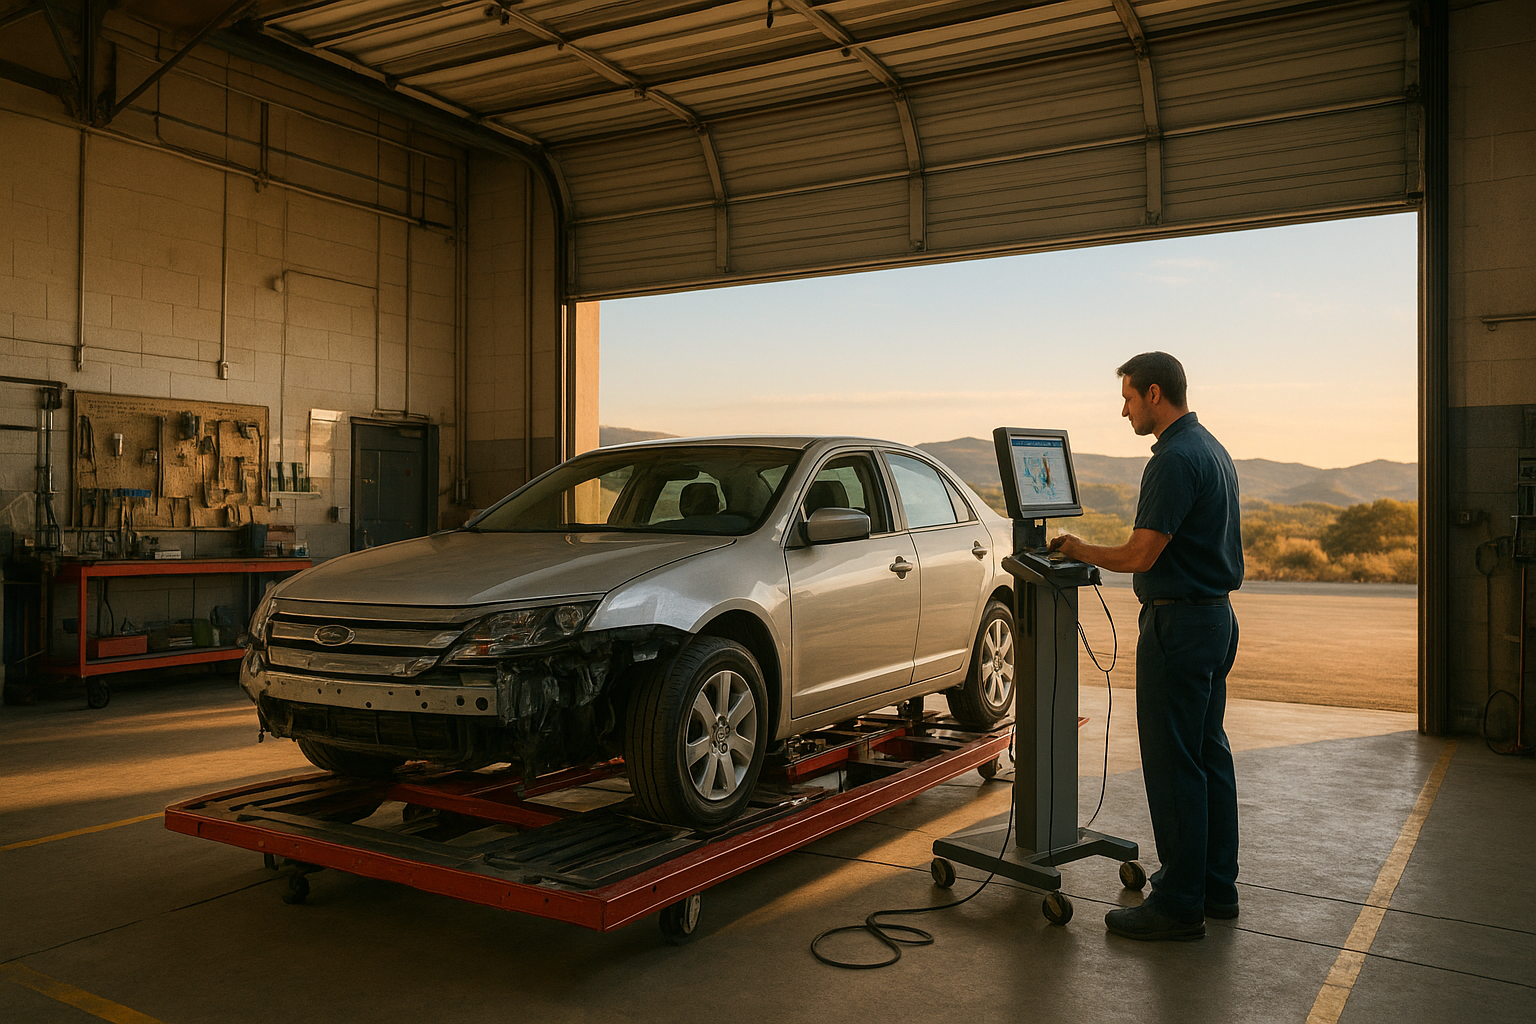
A professional collision repair environment built for Diamond Bar drivers who demand quality.
Quick Answer
The best auto body shops in Diamond Bar combine OEM-standard structural repair, computerized frame measuring, spectrophotometer color matching, and post-repair ADAS calibration. Together, these steps restore your vehicle to pre-accident safety and appearance — and prevent hidden problems from surfacing later.
What Does “Auto Body Diamond Bar” Actually Mean?
Auto body Diamond Bar refers to collision repair and vehicle refinishing services located in or near Diamond Bar, California — a community in eastern Los Angeles County along the 57 and 60 freeways. Simply put, auto body repair is the process of restoring a vehicle’s structure, panels, and finish after a collision, scrape, or weather damage.
However, the term covers far more than most drivers realize. In addition, it spans everything from a minor parking-lot dent to full structural reconstruction after a high-speed crash. Specifically, a full-service auto body shop handles:
- Collision repair — restoring panels, bumpers, and body lines damaged in an accident
- Frame and unibody straightening — correcting structural deformation using computerized measuring systems
- Paint and refinishing — applying primer, basecoat, and clearcoat matched precisely to your vehicle’s color code
- Paintless dent repair (PDR) — removing shallow dents without disturbing the original paint
- Glass replacement — windshield and window replacement with OEM or OEM-equivalent glass
- ADAS calibration — recalibrating cameras, radar, and sensors after repairs that affect their position
- Corrosion protection — seam sealing and cavity wax application to prevent rust in repaired areas
Diamond Bar drivers benefit from access to the broader San Gabriel Valley repair corridor. Therefore, understanding what separates a capable shop from an average one is genuinely worth your time before you hand over the keys.
How to Choose an Auto Body Shop in Diamond Bar
Finding a trustworthy auto body shop near Diamond Bar takes more than a quick Google search. Consequently, many drivers choose a shop based solely on proximity and end up dissatisfied. Instead, evaluate every candidate against these four pillars:
1. A Transparent, Documented Process
Ask how the shop documents damage. Specifically, do they photograph every panel and produce a written blueprint before ordering parts? Do they perform a teardown before finalizing the estimate? A teardown estimate — also called a blueprint estimate — removes trim and damaged components so the estimator can see what is actually broken, not just what is visible from the outside. This prevents surprise supplements mid-repair and keeps your timeline accurate.
Furthermore, ask whether they perform a dry-fit check before sending panels to the booth. This step — placing repaired or replacement panels on the vehicle before applying paint — confirms that gaps, alignment, and door swing are correct. As a result, you avoid the frustration of misaligned panels discovered only after clear coat has cured.
2. Equipment That Measures — Not Guesses
Structural repairs must reference OEM factory dimensions. A proper shop uses a frame rack with a computerized measuring system (such as Chief, Car-O-Liner, or Celette) to compare your vehicle’s actual geometry against manufacturer data. Without this, a technician is essentially guessing whether the structure is straight. Guessing is not acceptable on a vehicle that relies on precisely engineered crumple zones and suspension geometry.
Similarly, if your vehicle has aluminum panels, high-strength steel, or carbon fiber components, the shop needs dedicated tooling and separate work areas for those materials. Cross-contamination between steel and aluminum can cause corrosion. A shop equipped for mixed-material repairs demonstrates a genuine commitment to modern vehicle construction.
3. OEM Procedure Compliance
Every major automaker publishes repair procedures for their vehicles. In particular, these documents specify whether a panel should be repaired or replaced, which fasteners are single-use, how seam sealer should be applied, and whether a specific weld type is required. Shops that follow OEM procedures produce repairs that restore the vehicle to pre-loss structural integrity — not just pre-loss appearance.
Ask directly: “Do your technicians look up OEM repair procedures for my specific vehicle?” The answer should be yes, and it should be immediate.
4. Clear, Consistent Communication
Repair timelines depend on parts availability, insurance approvals, and technical sequencing. Therefore, a shop that communicates well — via text or email updates at each milestone — helps you plan rental car logistics and manage daily life. Poor communication is consistently the top complaint in auto body shop reviews nationwide. Consequently, it is a strong predictor of overall satisfaction.
The Auto Body Collision Repair Process, Step by Step
Understanding the collision repair workflow helps you compare shops honestly and set realistic expectations. Here is how a properly managed repair unfolds from drop-off to delivery.

From initial assessment to final calibration — every step matters for safety and appearance.
Step 1 — Check-In and Initial Documentation
At check-in, a service advisor photographs the full vehicle and records the damage narrative. This documentation protects both you and the shop, establishing a clear before-state that supports the insurance claim and the repair scope.
Step 2 — Teardown and Blueprinting
Technicians remove trim pieces, damaged panels, and any components that block access to the affected area. As a result, the estimator can see hidden damage — bent brackets, cracked mounts, damaged wiring — that is invisible in a surface inspection. The blueprint estimate, produced at this stage, is significantly more accurate than a drive-in quote. Consequently, you experience fewer mid-repair surprises.
Step 3 — Parts Ordering
Once the blueprint is approved, parts are ordered. OEM parts come directly from the dealer network. Aftermarket parts come from independent manufacturers. Recycled parts come from salvage vehicles. Each option has trade-offs in fit, finish, warranty coverage, and cost — all of which are discussed further in the estimates section below.
Step 4 — Structural and Mechanical Restoration
If the collision affected the vehicle’s structure, the frame or unibody is measured against OEM factory data on a calibrated rack. Pulls are made to precise tolerances — often within two millimeters — before any cosmetic work begins. If the impact reached the suspension, cooling system, or steering components, those are restored first. Structural integrity is always the foundation — everything else depends on it.
Step 5 — Panel Repair and Replacement
Skilled technicians repair panels that can be straightened to OEM profile without compromising strength. Panels that are too distorted — or panels where repair would compromise corrosion protection — are replaced. Subsequently, a dry-fit test verifies that panel gaps, door swing, and hood alignment meet the factory specification before any panel goes to the paint booth.
Step 6 — Refinishing and Curing
Panels enter a temperature-controlled spray booth where primer, sealer, waterborne basecoat, and clearcoat are applied in sequence. Flash times — the interval between coats — and bake temperatures are measured precisely. This is not optional: rushing flash times produces solvent pop and adhesion failures. Furthermore, adjacent panels are blended so the human eye perceives a single, continuous finish rather than a patch.
Step 7 — Reassembly
All trim, moldings, glass, and mechanical components are reinstalled. Single-use fasteners — clips and bolts that OEM procedures classify as one-time items — are replaced with new hardware. This detail matters because reused one-time fasteners can loosen over time, producing rattles or, in the case of structural bolts, a genuine safety issue.
Step 8 — ADAS and Electronic Calibrations
Any repair that affects sensors, cameras, radar, glass, bumpers, or ride height triggers manufacturer-required calibrations. These are performed using OEM scan tools or equivalent calibration targets. Calibration results should be documented with printed reports — not simply noted in a comment field. This documentation protects you and provides proof that the vehicle’s safety systems were restored properly.
Step 9 — Final Quality Inspection and Road Test
A quality control technician inspects panel gaps, finish texture and gloss, lighting function, wiper operation, and safety system status. The vehicle is then road-tested to confirm alignment feel, absence of wind or water noise, and normal operation of all repaired systems. Only after passing this inspection is the vehicle scheduled for delivery.
Auto Body Paint Matching Under Diamond Bar Sunlight
Southern California’s intense sunlight is unforgiving. Specifically, it reveals color mismatches, texture differences, and gloss inconsistencies that would be invisible under artificial light. For Diamond Bar drivers, paint quality is therefore not a cosmetic luxury — it is a functional requirement.

Spectrophotometer readings, blend strategy, and controlled booth conditions combine for an invisible repair.
Spectrophotometry: Measuring the Exact Color
A spectrophotometer — a handheld device that shines multiple wavelengths of light onto your paint and measures what bounces back — captures the precise color signature of your vehicle’s aged finish. It accounts for how metallic flake has oriented over time and how pearl pigments have settled. As a result, the mixing formula generated is far more accurate than simply looking up your car’s factory color code, which represents the paint as it left the factory — not as it looks today.
Furthermore, spray-out cards — small test panels sprayed with the mixed formula — are reviewed against your vehicle before any paint is applied to panels. Adjustments are made at this stage. This step adds time but prevents a visible mismatch from making it to your vehicle.
Blend Strategy for Metallics and Tri-Coats
Solid colors can often be spot-painted without visible transition. However, metallic, pearlescent, and tri-coat finishes are far less forgiving. For these paints, skilled technicians use a blend technique — feathering the new color into adjacent panels so the transition is imperceptible. Without blending, even a perfect color match can show an obvious edge under direct sunlight.
Tri-coat finishes — three separate layers including a transparent color coat — require particularly careful sequencing. In addition, each layer must cure adequately before the next is applied. Shortcuts here are visible from twenty feet away in Southern California sun.
Clearcoat, Film Build, and Surface Texture
The final clearcoat layer determines gloss level, orange peel (the subtle texture visible on all factory finishes), and long-term durability. Consequently, choosing the right clearcoat system and applying it at the correct film build is essential for matching the surrounding panels. OEM-matched clearcoat products, properly applied in a climate-controlled booth, produce results that look factory-fresh — not patched.
Estimates, Insurance, and Parts Decisions Explained
Most Diamond Bar drivers interact with both their auto body shop and their insurance company during a repair. Understanding how these relationships work — specifically, how estimates are built and how parts are selected — helps you make informed decisions and advocate for yourself.
How to Read and Compare Estimates
Do not compare estimates by total dollar amount alone. Instead, compare them line by line. Specifically, ask these questions of every estimate you receive:
- Does the estimate include a teardown fee to expose hidden damage, or does it assume surface damage only?
- Are structural measurements included as a line item, or are they absorbed into a flat labor rate?
- Does the estimate account for ADAS calibrations that may be required based on the affected area?
- Are repair vs. replace decisions explained with reasoning, or simply listed as cost-saving replacements?
- Is corrosion protection — seam sealing, cavity wax, anti-corrosion primer — itemized, or absent entirely?
A lower estimate that excludes teardown, calibrations, and corrosion protection is almost never actually cheaper. In practice, those items surface as supplements mid-repair — after you have already committed to the shop.
OEM vs. Aftermarket vs. Recycled Parts
Parts decisions significantly affect repair quality, particularly on structural components and panels that integrate with ADAS sensors. Here is what each category means in practice:
OEM Parts (Original Equipment Manufacturer)
Made by or for the vehicle manufacturer. Best fit, finish, and compatibility with ADAS sensor housings. Generally highest cost. Required by some manufacturers for structural components under warranty.
Aftermarket Parts (Non-OEM)
Manufactured independently. Quality varies significantly by brand and vehicle model. Acceptable for some non-structural panels; however, be cautious on parts that house sensors, attach to structural members, or affect corrosion zones.
Recycled (LKQ) Parts
Removed from salvage vehicles. Can be cost-effective for lower-mileage vehicles with matching paint codes. Ask about mileage, age, and corrosion history of any recycled structural component.
Your Right to Choose Your Shop
Under California law, you have the right to choose which auto body shop repairs your vehicle — regardless of what your insurance company recommends. Insurance company “preferred shop” programs exist primarily to control costs. Consequently, they may use aftermarket or recycled parts more aggressively than you would prefer. You are not obligated to use a shop simply because your insurer recommends it.
That said, choosing a shop outside the preferred network may require additional communication with your adjuster. Therefore, confirm how supplements, approvals, and warranty coverage will be handled before authorizing repairs at any shop.
Realistic Repair Timelines for Diamond Bar Drivers
One of the most common frustrations in collision repair is timeline surprises. Specifically, a repair quoted at three days stretches to two weeks. Understanding what drives timing helps you ask better questions upfront.
| Repair Type | Typical Timeline | Primary Variables |
|---|---|---|
| Minor cosmetic (dent, scratch) | 1–3 days | Parts in stock, no insurance |
| Single-panel collision repair | 3–6 days | Parts delivery, insurer approval |
| Multi-panel with structural repair | 1–3 weeks | Structural work, supplement approvals |
| Major collision with ADAS calibration | 2–4+ weeks | Parts, structural, calibration scheduling |
| EV with battery inspection required | Add 3–7 days | Dealer or OEM scan tool availability |
The three biggest timeline drivers in the Diamond Bar area are specifically: parts availability (OEM parts for certain makes can have multi-week lead times), insurance supplement approvals (insurers must approve additional damage found after teardown before work can proceed), and calibration scheduling (some calibrations require specialized equipment or a dealer visit).
A well-run shop shares a repair plan with target milestones at the start, notifies you when parts arrive, and proactively communicates any changes. Furthermore, they track rental coverage expiration and work to keep repairs on schedule. Ask prospective shops directly how they handle communication and supplements — it is one of the clearest signals of operational quality.
EVs and ADAS: What Diamond Bar Auto Body Customers Need to Know
Electric vehicles and advanced driver-assistance systems have fundamentally changed collision repair. Diamond Bar sits in one of the highest EV-adoption regions in the United States. Therefore, the chances that your next repair involves one of these technologies is significant.
Electric Vehicle Repair Requirements
Repairing an EV requires specific safety protocols that not all body shops have implemented. Specifically, these include:
- High-voltage system disable — the HV system must be safely deactivated before structural work begins. This requires trained technicians and proper PPE (personal protective equipment).
- Insulated tooling — standard metal tools can create arc paths near high-voltage components. EV-rated insulated tools are required.
- Battery inspection and temperature monitoring — lithium-ion battery packs can enter thermal runaway hours or days after a collision, even when the vehicle appears undamaged. Battery inspection — using OEM scan tools to read cell voltages and temperatures — is essential after any impact near the battery zone.
- Temperature-controlled storage — damaged EVs should not be stored in enclosed spaces without monitoring for off-gas or thermal events.
When evaluating Diamond Bar auto body shops for EV repair, ask specifically about their EV training certifications, tooling, and battery inspection procedures. A shop that cannot answer these questions clearly is not ready to repair your EV safely.
ADAS Calibration After Collision Repair
ADAS — Advanced Driver Assistance Systems — includes forward collision warning, automatic emergency braking, lane centering, blind-spot monitoring, adaptive cruise control, and parking assist. These systems rely on cameras, radar, lidar, and ultrasonic sensors that are precisely positioned to work correctly.
Any repair that affects the following areas may require ADAS calibration:
- Windshield replacement (front camera)
- Front or rear bumper repair or replacement (radar, ultrasonic sensors)
- Front grille or fascia (radar sensor behind grille)
- Door mirror replacement (blind-spot radar)
- Any structural repair that changes ride height or vehicle geometry
- Suspension component replacement
Calibrations fall into two categories. Static calibration is performed in the shop using precise target boards positioned at OEM-specified distances and angles. Dynamic calibration requires driving the vehicle at specific speeds on a clear road while the system teaches itself against lane markings and traffic patterns. Some vehicles require both. In all cases, the shop should provide printed calibration reports as documentation.
Skipping or improperly performing calibrations is one of the most dangerous cost-cutting shortcuts in the industry. A miscalibrated forward collision system may not engage at all — or may engage unexpectedly. Consequently, insist on documented calibration results before accepting your vehicle.
Red Flags to Avoid When Choosing an Auto Body Shop Near Diamond Bar
Not every collision repair shop operating in the Diamond Bar area meets the same standard. However, specific warning signs make it relatively easy to disqualify poor performers before you commit. Watch for these red flags:
- No teardown before finalizing the estimate. A shop that refuses to perform a teardown before submitting a final estimate to your insurer is cutting corners. Consequently, you will face supplement battles and timeline extensions mid-repair.
- Vague or verbal estimates. Legitimate shops provide written, itemized estimates. If a shop provides only a verbal quote or a single total with no breakdown, walk away.
- No mention of ADAS calibration. If the damage is near any sensor or camera zone and the shop does not proactively mention calibration, they may not be equipped or trained to perform it.
- Pressure to accept insurance company parts without explanation. Shops that push you toward aftermarket or recycled parts without explaining the trade-offs — specifically on structural panels and sensor housings — may be optimizing for insurer payment rather than your vehicle’s safety.
- No warranty on repairs. Reputable shops stand behind their work. A limited lifetime warranty on paint and structural repairs is standard in the industry. Therefore, absence of a warranty is a significant red flag.
- Cluttered, disorganized facility. Shop organization reflects operational discipline. A disorganized facility is often a sign of disorganized processes — and disorganized processes produce inconsistent results.
A Nearby Auto Body Option Diamond Bar Drivers Frequently Consider
When Diamond Bar drivers search for a qualified collision repair facility, Brea Auto Body is consistently among the options they explore. Located conveniently close to Diamond Bar via the 57 freeway, it offers a range of services specifically relevant to the repair standards discussed throughout this guide.
Before scheduling, review their site to confirm which services are currently available. In particular, inquire about:
- Training certifications for your specific vehicle make
- Availability of OEM repair procedure documentation in the shop
- ADAS calibration equipment and process for your vehicle’s sensor suite
- EV repair protocols if your vehicle is electric or hybrid
- Estimate and communication process from intake to delivery

Before and after: proper panel fit, color continuity, and gloss are the hallmarks of a quality repair.
Distance is always a consideration. However, the real benefits come from process transparency, documented structural measurements, verified ADAS calibrations, and a finish that blends seamlessly with the rest of your vehicle — qualities worth a slightly longer drive if your nearest option cannot demonstrate them.
FAQ: Auto Body Diamond Bar
How do I find a reputable auto body shop in Diamond Bar?
Start by asking for written estimates that include teardown, calibrations, and corrosion protection as line items. Verify that technicians reference OEM repair procedures. Check Google and Yelp reviews specifically for comments about communication, timeline accuracy, and finish quality. Ask whether the shop warranties its work in writing.
How do I compare collision repair estimates?
Look beyond the bottom line. Compare estimates line by line. Specifically, verify that each includes teardown, structural measurements, ADAS calibrations, OEM-consistent repair vs. replace decisions, and corrosion protection. A lower number that excludes these items is almost never cheaper in practice.
What parts should I expect in a collision repair?
Depending on your vehicle, insurer, and damage scope, you may see OEM, aftermarket, or recycled components. OEM parts offer best fit and sensor compatibility. Aftermarket quality varies widely. Recycled parts can be cost-effective for non-structural exterior panels. Ask how each choice affects ADAS sensor housings, corrosion protection, and any existing manufacturer warranty.
How long will my auto body repair take in Diamond Bar?
Minor cosmetic work typically takes one to three days. Single-panel collision repairs run three to six days. Structural repairs with ADAS calibration can take two to four weeks or more. Parts availability, insurance supplement approvals, and calibration scheduling are the most common drivers of extended timelines. Ask your shop for a milestone schedule at the start of the repair.
Can I choose my own auto body shop?
Yes. In California, you have the legal right to choose any licensed auto body shop for your repair — regardless of insurer recommendations. Confirm how supplements, approvals, and warranty coverage will be handled before authorizing work, particularly if you choose a shop outside your insurer’s preferred network.
Does my auto body repair include ADAS recalibration?
It depends on the repair scope and the shop’s capabilities. Any repair affecting sensors, cameras, radar, glass, bumpers, or ride height typically requires manufacturer-specified calibration. Ask your shop whether calibration is included and how results will be documented. Insist on printed calibration reports before accepting your vehicle.
What is paintless dent repair (PDR)?
Paintless dent repair uses specialized tools to massage shallow dents out from behind the panel without disturbing the factory paint. It is faster and less expensive than traditional refinishing. However, it is only appropriate for dents where the paint surface has not cracked, creased, or been significantly stretched. Larger dents, dents on panel edges, or any area where paint has broken require conventional repair and refinishing.
How do I know if a shop uses quality paint products?
Ask which paint system the shop uses — reputable names include PPG, BASF Glasurit, Axalta, and Standox. Confirm that they use waterborne basecoat systems, which produce superior color accuracy and meet California’s environmental regulations. Furthermore, ask whether they use a spectrophotometer for color matching and whether spray-out cards are used to verify the formula before painting your vehicle.
Conclusion: Finding the Right Auto Body Shop in Diamond Bar
Choosing the right auto body Diamond Bar shop comes down to process, equipment, and communication — not just price. Specifically, look for shops that blueprint before ordering parts, measure structure against OEM data, document calibrations with printed reports, and communicate proactively at every milestone. These qualities separate shops that restore your vehicle to pre-loss safety from those that simply restore its appearance.
Furthermore, as EVs and ADAS technology become standard across the Diamond Bar vehicle fleet, the technical requirements for proper collision repair continue to rise. Consequently, choosing a shop that invests in training, tooling, and OEM procedures is increasingly important — not just for satisfaction, but for safety.
When you’re ready to move forward, explore nearby resources like Brea Auto Body, ask the right questions, compare capabilities — and choose the partner that earns your confidence from first estimate to final delivery. Your vehicle — and your safety — deserve nothing less.

